gis
NOTES:
- There are minor (negligible) differences in the installation between 10.0 and 10.1. The instructions below are for 10.0 Education Edition installation.
- John Weeks, maintains a set of ESRI Support pages for USU staff and students, that provide similar instructions for a wider range of scenarios if you are using one of our campus site licenses (e.g. Manual ArcGIS License Renewal)
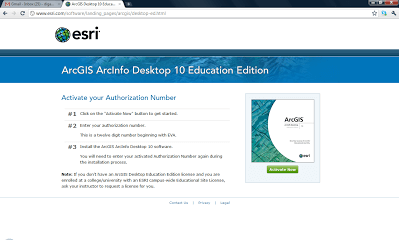
Step One: Authorize EVA
The first step is to authorize the registration number provided for you inside the DVD case.
Go to http://www.esri.com/EducationEdition to activate your authorization number (the 12-digit number beginning with EVA)
You will need to log in with your ESRI account credentials, or create a new account.
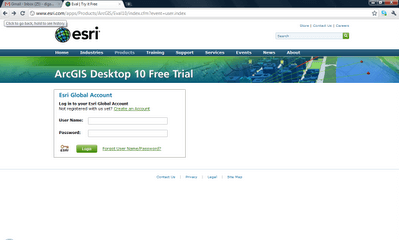
Upon creating a new account, you will be asked to enter your registration number. ESRI will then send you an email with the same authorization number telling you that the number is ready for use. You can then proceed to step two (note if you accidently install ArcGIS before doing this, you will still be able to use the ArcGIS Administrator (accessed from Start -> Programs -> ArcGIS -> ArcGIS Administrator) to authenticate the installation after the fact.
Step Two: Install ArcGIS
These procedures work whether you download the installation files or use the installation DVD for ArcGIS Desktop 10 available from Software Licensing.
Insert the disc and you will see the main menu below (if the AutoPlay does not run, use the ESRI.exe to bring up the main menu):
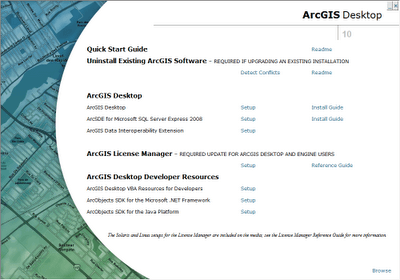
If you have old versions of ArcGIS (e.g. 9.3.1) you will need to uninstall them first. You can use the ‘Uninstall Existing ArcGIS Software’ to make sure this has taken place.
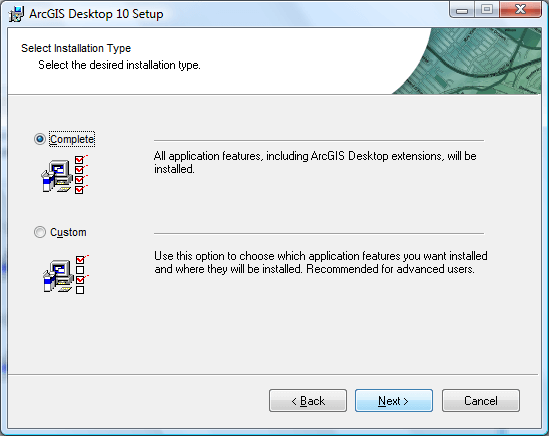
Next you will want to install the ArcGIS Desktop. Run the ‘Setup’ next to ArcGIS Desktop. In the install process, choose a complete install so that ArcGIS installs all the extensions, Python and other options (Custom if you want to choose not to install some of these extra components):
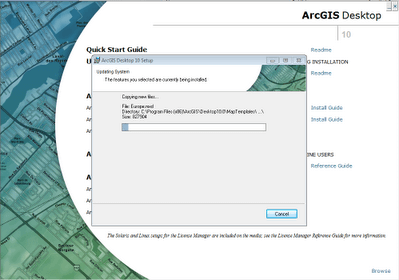
The other parts of the setup are straight forward and the installation may take several minutes (upto 30 minutes on a slow machine):
Upon completion of the ArcGIS Desktop 10 Setup, you will see this dialog:
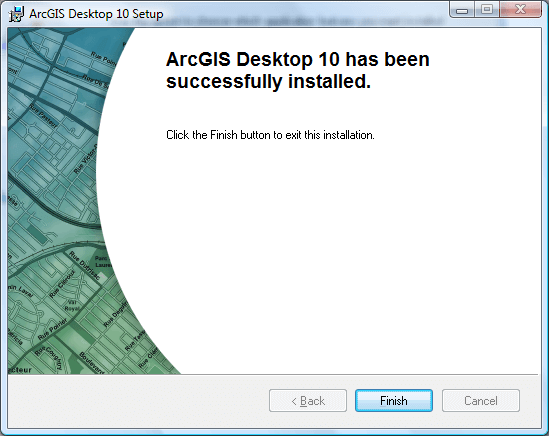
Click Finish and the ArcGIS Administration Wizard will automatically start.
Step Three: ArcGIS Administrator
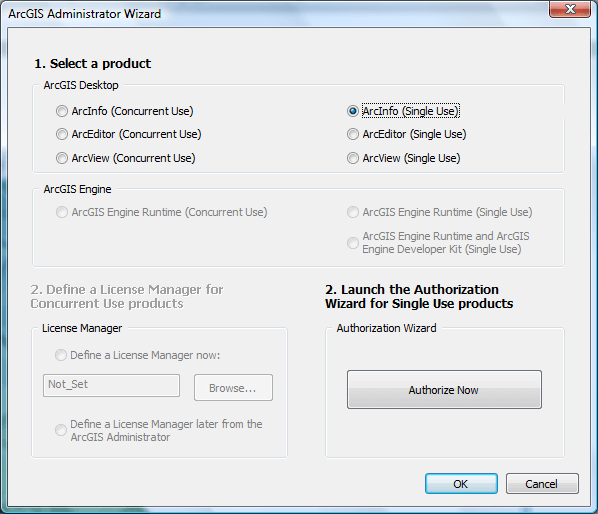
The Administration Wizard is where you specify the type of ArcGIS Desktop product you want to authorize and authenticate your license. If you do not have internet access or you have not completed the Step One Above to authenticate the authorization codes at http://www.esri.com/EducationEdition, you can cancel away from this step and authorize your product later using the License Manager. Otherwise,
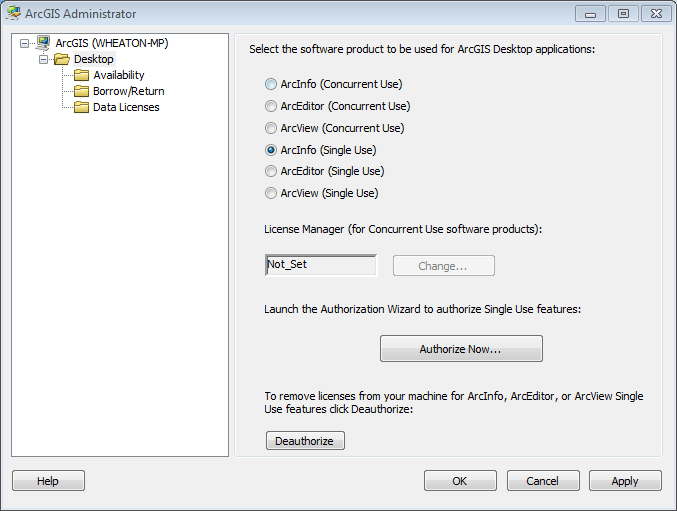
This will bring up the wizard. For an Educational edition you want to click on the Desktop and then change the settings in the dialog below to ArcInfo (Single Use) and then click on Authorize Now.
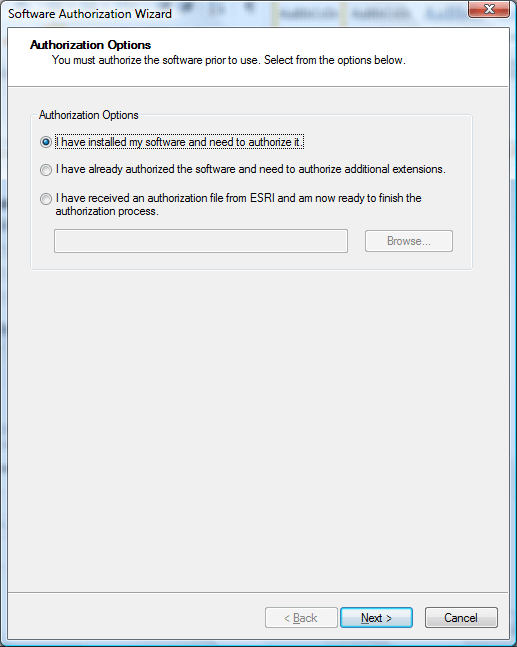
As you have already installed your software, click on the ‘I have installed my software and need to authorize it’ option and click next.
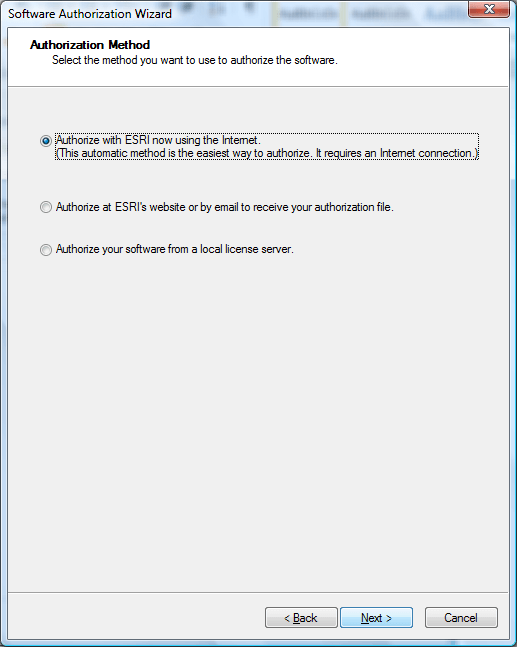
Choose to ‘Authorize with ESRI now using the Internet.’
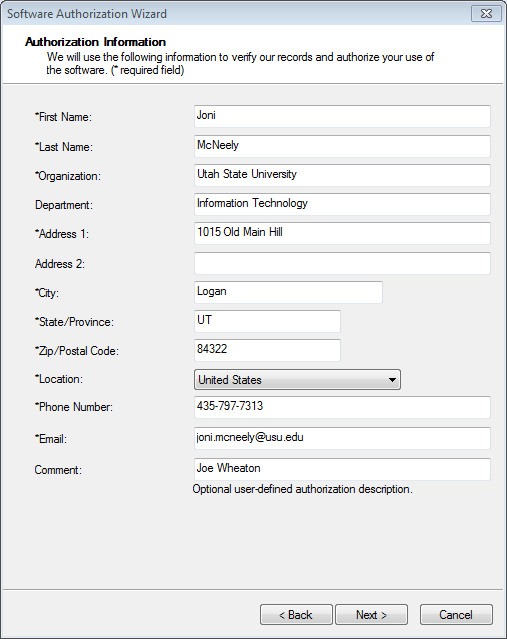
Click Next > and you will be asked for some authorization information. Make sure to Use Utah State University as the organization. Fill out the rest as appropriate for your situation:
Make sure to specify that you are a student in the next screen.
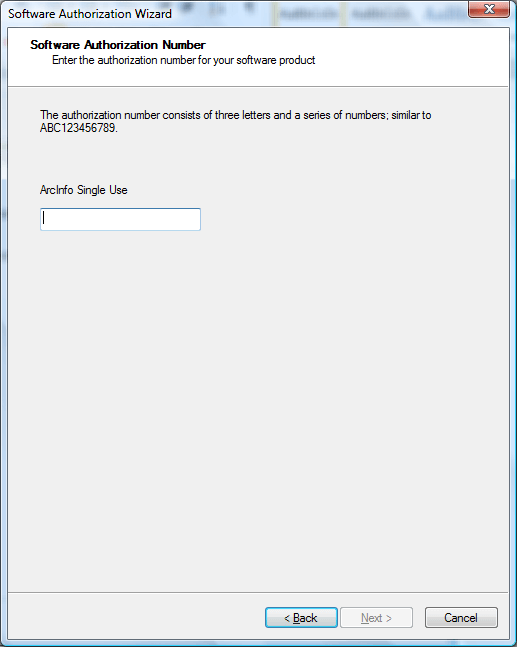
Finally it asks for the Authorization number. Enter in the EVA code from the DVD case and/or your email from ESRI:
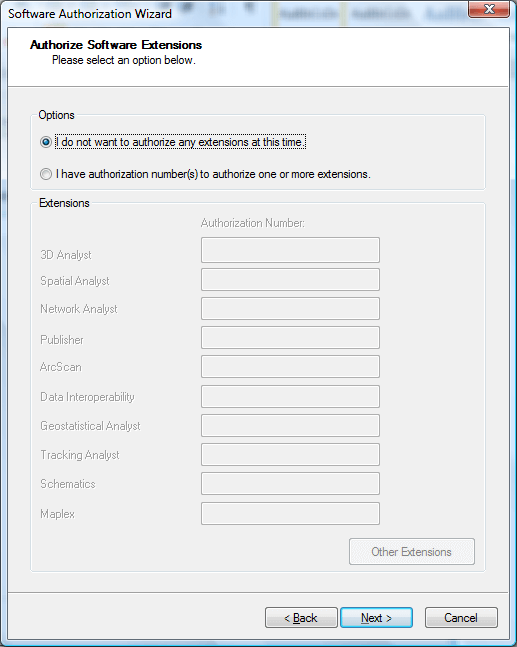
The next screen tends to confuse people. The extensions have already been installed, so you do not enter in licenses for these with the education version. Stick with the default, and proceed to the next screen.
Here you want to include access (for one year) to all those extensions you installed. Highlight the extensions you want to evaluate:
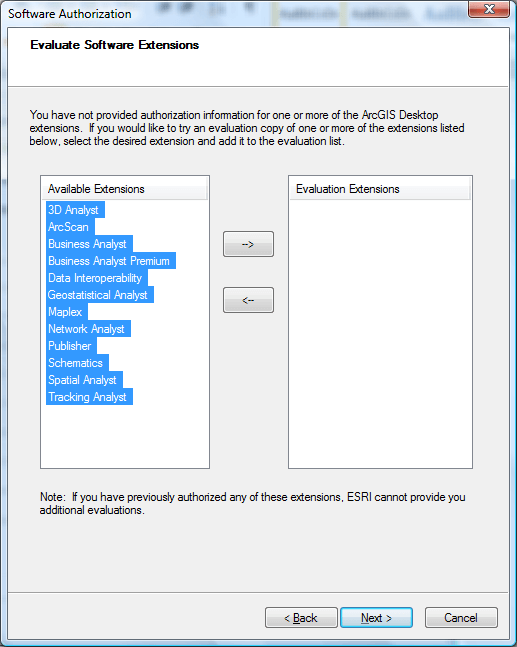
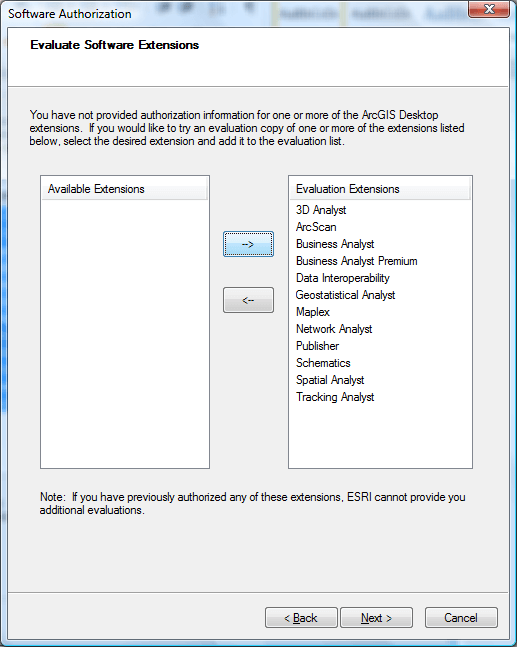
Then use the –> to move them to the right hand side and hit next:
Now, you should see it communicating with ESRI to authorize the software and extensions (number will vary):
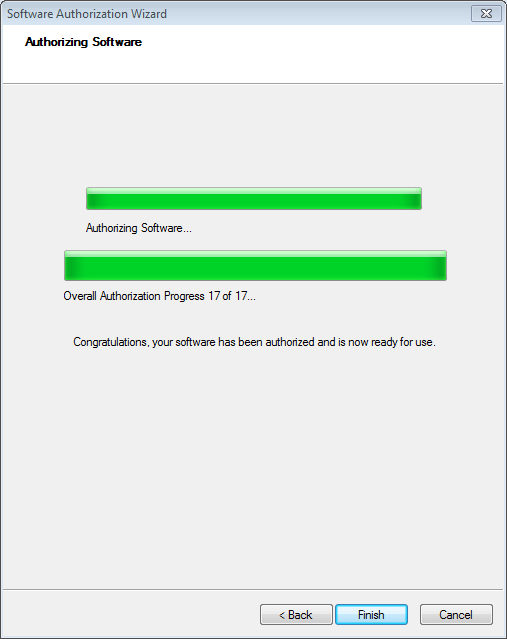
Your software should now be authenticated and ready for one year of use. Enjoy. Exit The ArcGIS Administrator and start ArcGIS to make sure it works. Note you will need to turn on the extensions in ArcGIS for them to be accessible (see here for help getting started).
What if it Fails to Authenticate?
If you get an error message during the ‘Authorizing Software’ like this:
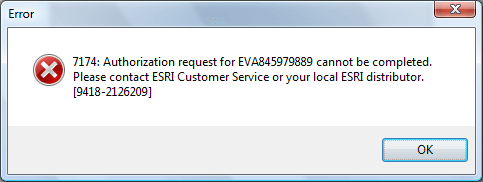
Don’t panic. This usually means that you failed to complete step one, you entered the wrong code in, you are using a code that has already been used elsewhere, or there is an internet connection problem. The authentication of the software (i.e. licensing) is totally separate from the installation of the software. The software can be completely installed, you just can’t use it. There are many different ways to authenticate after the fact and this can be done using ArcGIS Administrator, which would have been installed with the software. To rectify the problem, complete step one (if you have not already) and then see below for instructions for authenticating after the fact. If this still does not work, try contacting ESRI Support.
Using ArcGIS Administrator to Authenticate After the Fact or License Renewal
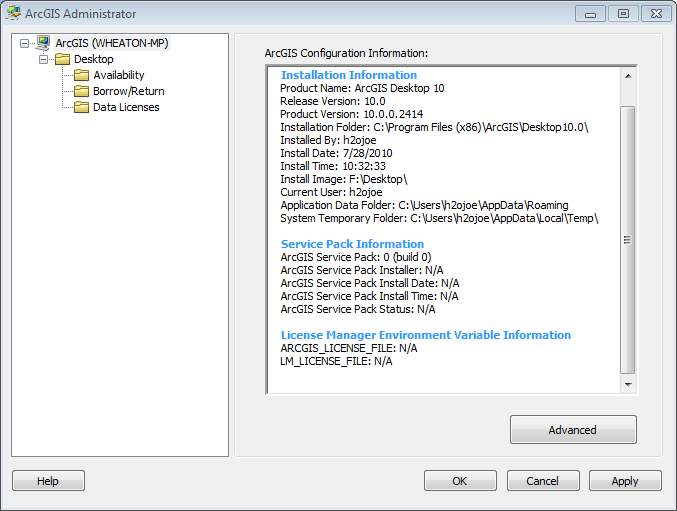
If you need to modify your licenses, you can again use the License Manager. For example, if you purchase a license, or get another education edition license, you don’t need to re-install the software. Instead you can simply use the Administrator to update or change your license. You will see the following main screen:
Click on Desktop and you will see options. For an Educational edition you want to click on the Desktop and then change the settings in the dialog below to ArcInfo (Single Use) and then click on Authorize Now.
This will bring up the wizard. As you have already installed your software, click on the ‘I have installed my software and need to authorize it’ option and click next.
Choose to ‘Authorize with ESRI now using the Internet.’
Click Next > and you will be asked for some authorization information. Make sure to Use Utah State University as the organization. Fill out the rest as appropriate for your situation:
Make sure to specify that you are a student in the next screen.

Finally it asks for the Authroization number. Enter in the EVA code from the DVD case and/or your email from ESRI:
The next screen tends to confuse people. The extensions have already been installed, so you do not enter in licenses for these with the education version. Stick with the default, and proceed to the next screen.
Here you want to include access (for one year) to all those extensions you installed. Highlight the extensions you want to evaluate:
Then use the –> to move them to the right hand side and hit next:
Now, you should see it communicating with ESRI to authorize the software and extensions (number will vary):
Your software should now be authenticated and ready for one year of use. Enjoy. Exit The ArcGIS Administrator and start ArcGIS to make sure it works. Note you will need to turn on the extensions in ArcGIS for them to be accessible (see here for help getting started).
THIS IS NOT AN OFFICIAL ESRI site! These instructions were compiled simply to help students who were having trouble installing Education Edition licenses. You may not use the Education Edition for any use other that specified in the ESRI License Agreement.