gis
Introduction
Without good file management and organization, this will be a very long and frustrating semester for you. You are free to adopt what ever file management system works for you, but most students typically err on the side of disorganized and sticking to whatever defaults ArcGIS makes for you. This is a recipe for lots of broken links and red exclamation marks! in your table of contents (in time you’ll see what I mean). This page provides some suggestions for how to manage your files to prevent so many tears.
Most students will probably be working on assignments in a variety of locations on different machines at different times. You may start a lab in the Quinney computer lab, work on it again later at a different machine in the Quinney lab, then work on it from home using your student version of ArcGIS on your personal computer. As such, you will need to keep your map documents and GIS files well organized so you can easily transfer them between different machines. It is virtually guaranteed that at some point this semester, you will run into trouble making a map or doing a simple geoprocessing task, and the reason will point back to a file management problem.
Storage Choices & Tradeoffs
Storage Location
This table summarizes your primary choices for where to store your GIS data for this class and the pros and cons of each:

NOTE: It is okay to backup and store your data on the cloud (e.g. Egnyte, SkyDrive, DropBox, Google Drive), but DO NOT actively work off a network drive (recipee for disaster). You can work off of a local drive/folder that is synced to the cloud, but don’t work off the cloud live as it depends entirely on the quality of your network connection.
Be Careful with Synchronization & Backups
It is very easy to mess up when synchronizing data between storage locations. The safest bets are typically to:
- Copy and overwrite everything - this can be very slow, and if you change folder names it does not delete the old folders at the destination folder
- Delete everything at destination, and copy entire source - this can be very slow
- Very carefully manually copy and delete files and folders as necessary
- Use some sort of folder clone (e.g. FolderClone) or folder synchronization (e.g. FolderMatch; e.g. Allway Sync) software (not a backup software)
Do not attempt to synchronize or backup data while ArcGIS software is open that is referencing that data.
Our Recommendations
- Use a portable USB drive if you are working on multiple machines in multiple locations. Make a local copy of your data if you need to do any heavy geoprocessing tasks, and then synchronize back to your portable drive when you are done.
- No matter where you work, always keep some sort of backup of your data
- We strongly discourage you from creating any MapDocuments that have data layers stored in a mix of locations (i.e. some on a desktop, some on a portable drive, some on a local drive, some on a network drive). You are better to save your Map Document in a folder, in which the data it refers to is the same folder or child folders. The exception to this of course is Arc Basemap layers, data from ArcGIS online, or data referring to some other webGIS server.
Suggested Folder Organization
Once you decide where you are going store your GIS data, you need to have an organized directory structure that is logical and easy to navigate quickly to the files you need when you need them. We have prepared a folder structure template you might use for this course (click on for larger view):
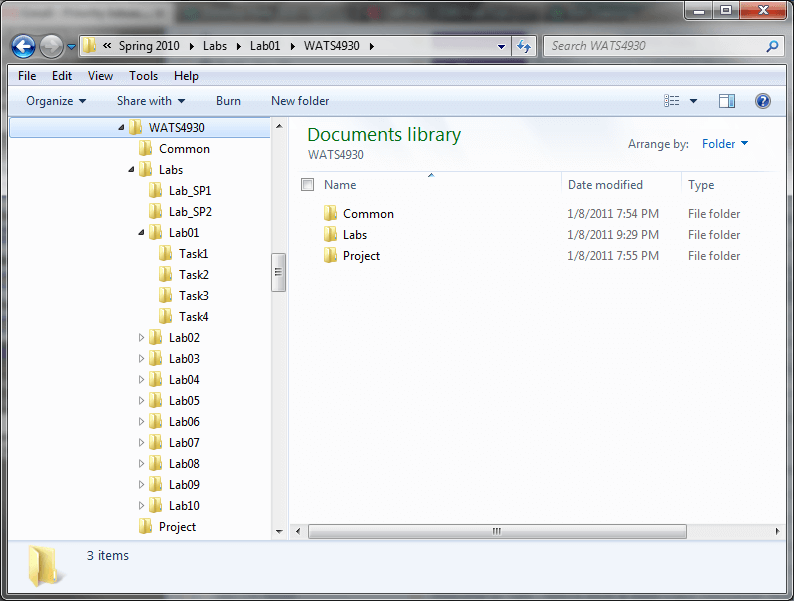
Folder Template: WATS4930.zip ![]()
You can unzip the folder template to any parent folder (WATS4930 in the example above) in your chosen storage locations. The directories are organized as follows:
Common- For any common base layers you find yourself using across labs and/or your projectLabs- With a subdirectory for each lab.Project- For your project data and maps
Within each Lab0X folder there are four TaskX subfolders for each of the lab tasks associated with each lab (not all labs have that many tasks and you may not use or delete some of these). We recommend that you save a new Map Document (*.mxd) file for each map you make and store these according to task. Feel free to create as many additional subdirectories as you find helpful (just avoid putting spaces or odd characters in the folder names as ArcGIS may complain occasionally). The video below shows you how to unzip this folder to a location you want to use it:
If you are unfamiliar with dealing with zip files, see here.
Storage Formats
We will cover data types and storage formats in Week 02.