gis
What is Figure For?
Finally, when you’ve assembled your figure and you are happy with it, there is the question of where will you use it. In the beginning of the Figure Preparation Guidelines, we discussed the different potential different outlets for your figure:
- Report (e.g. inserted in a word document but report with embedded figures is distributed as a PDF)
- Manuscript / Journal Article (i.e. publication quality figures, which include maps are submitted as separate PDFs or EPS at high resolution)
- On a web page (i.e. should be a *.png or *.jpeg; and may need to be displayed on main page at one size and a higher resolution version available when clicked on)
- In a presentation (e.g. a PowerPoint talk… so a portrait layout will NOT fill page)
Sometimes you’ll want to produce the figure that will suffice for all four. Depending on what you are going to use it for, you may need a different file format, and different file sizes.
Where and What to Keep?
How you choose to manage your files is your prerogative, but it is often convenient to keep the building blocks of figures separately from the ‘final’ versions of the figure itself. For example, for a given ‘Figure01’, it may make sense to have a subfolder with the building blocks of the figure, and then in the root where the figure is stored the following:
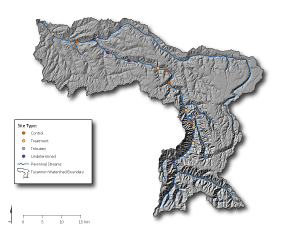
Figure01.ai- The editable full Adobe Illustrator FileFigure01.pdf- A full AI editable PDF version of the file (be careful, as edits made in the pdf will NOT be reflected in the *.ai file unless you save it as both) OR a reduced size (uneditable) PDF.Figure01.png- A full resolution version of the figureFigure01_300px.png- A reduced resolution (300 px wide) version of same figure (for example what is shown in the figure above ↑. By controlling file size, you can export figures that are the exact size you want for the webpage (and in this case I even make the hyperlink if you click on the figure goto a the higher resolutionFigure01.pngFigure01_HR.png- A ultra high resolution version of same figure
The above list is by no means exhaustive, but you will find that *.png s are much easier to share via email, on websites, etc. and use in web pages, presentations, or reports because they are so much smaller. If you wish to download all the various flavors of the figures shown in the videos and mentioned above download AI.zip ![]() .
.
Managing File Sizes
One of the downsides to making figures in Adobe Illustrator is that the file sizes can become quite large. As such there are a few basic tricks to give you control:
Save the File as a PDF
It is simple to save your Adobe Illustrator file as a PDF from AI. This preserves the full editing capabilities, but also allows you to share the PDF with anyone with a PDF reader.
Export the File Using Save for Web
Exporting from AI using the save for web allows you to save flat raster images of your figures in a variety of formats (e.g. PNG, JPG, GIF). You can resize the images to any size you prefer too.
Making a Smaller PDF
Sometimes the PDFs you save from Adobe Illustrator (above) can be quite large. If you have Adobe Acrobat Pro installed (part of CS suite), I walk you below through two ways you can achieve much smaller file sizes. The first relies on using the ‘Save as Reduced File Size PDF’ option in Acrobat. The second uses the convert image to PDF. The second is much more efficient (often resulting in over an order of magnitude reduction in file size), but requires you to export a raster image using the save for web (above) option. The video shows the simple steps:
