gis
There are many ways to work in ArcMap. If you are completely new to GIS, you may consider taking the free Getting Started in ArcGIS webinar (9 hours… you can browse through it much quicker if you just need a review). You may also find some of the tutorials listed here helpful. Those wanting a refresher and to see some of the new features of ArcGIS 10 may like Using ArcMap in ArcGIS Desktop 10 webinar (3 hours). On this page, we highlight a suggested workflow for you to follow when you start every new map document in ArcMap to make your life a little easier in managing your files and completing the labs. We also highlight the task of exporting your maps to figures or PDFs as this is something you will do for every lab.
Suggestions for Making New Maps from Scratch
Before you start a new map, think about 1) where is the best place to house the map, 2) where the existing data you will load resides, and 3) where the data you will create for the map should reside (i.e. file management). A few minutes of forethought, can save hours of problems later. Here are some tips.
Always Excercise Control over the Default Geodatabase
In every new map document you create in ArcGIS 10, you have the option of specifying the default geodatabase. The default if you do not specify it is in an obscurely located geodatabase in you system folder. ESRI describes the default geodatabase as:
“The location is used for adding datasets and for saving resulting datasets created by various editing and geoprocessing operations. For example, when you export features from a layer, the data will be saved in the map’s default geodatabase unless specified otherwise. The default geodatabase is synchronized with Current Workspace of Geoprocessing Environments, therefore, all output from tools or models will be saved to this default location.”
Therefore recommend that before starting a new map, you have a file geodatabase you wish to use already created (it can be empty). You can always modify the default after you start your new Map Document, and you can often specify a different location for saving resulting datasets made from that Map. However, it saves a lot of time if this data is saved in a location that is deliberate and convenient by default. This video shows you how to use ArcCatalog to create this geodatabase ahead of time:
We suggest putting your geodatabase either in the same directory, or a parent directory to where your Map Document will reside. We also recommend using file geodatabases over personal geodatabases as they have larger size limitations (i.e. 1TB vs 2GB).
Making the Map Document
When you start ArcMap a Getting Started dialog box appears.
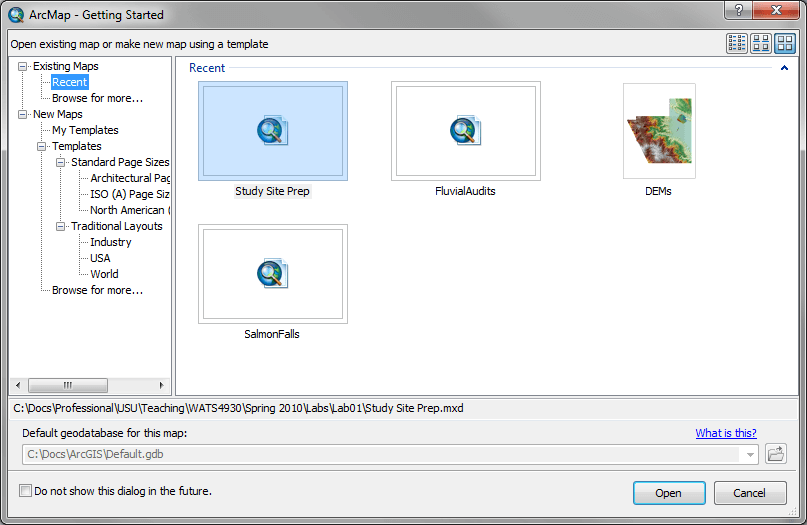
If you switch to New Maps in the left pane of this dialog, you will be able to specify the default geodatbase for the map at the bottom. An example of how you would do this and the critical steps of setting the map document to store relative path names is shown in the video below.
If you do not know what relative vs. absolute paths are, read this.
Exporting a Map as an Image
Sometimes lab assignments will require you to include an image of your map or your results. This can be done by exporting the map. Click on the File menu, and select Export Map…
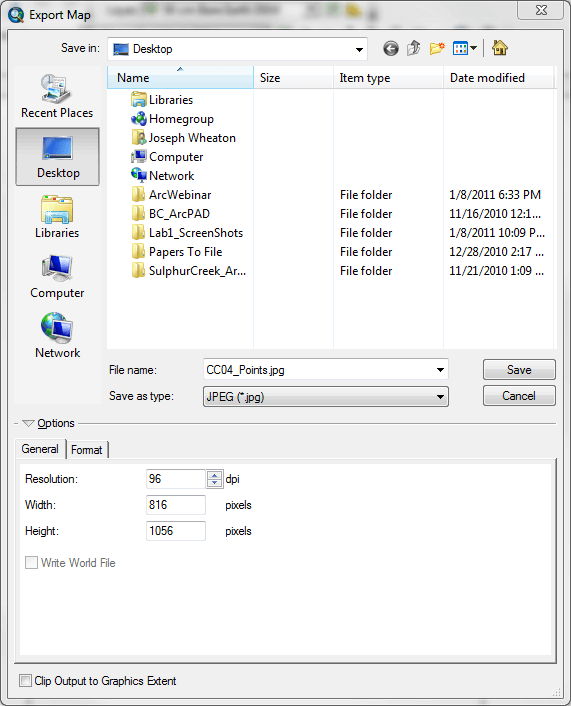
When the Export Map dialog window opens, select the file type you want (e.g. *.jpg or *.pdf), and name the file. See here for my details on exporting maps. Note that a PDF can be shared with anyone and posted on your website. Note that images can be displayed on your websites, or inserted into a Microsoft Word Documents (for example) and printed out or saved as PDF reports. Please note that if you export from the Data View, the size of the image or PDF is set by your resolution and extent, whereas if you export from the Layout View the image or PDF is sized based on the paper size you specify (to learn more about the Data and Layout Views, read here).